Learn How to Configure a Relay Connector in Exchange 2016
Organizations often use internal applications, network devices, or even legacy systems that need to send email notifications. However, the problem is that many times these archaic services lack the capability for modern SMTP authentication. To bypass this limitation, IT administrators can create a relay connector in Exchange 2016 or 2019. The steps remain the same for both platforms.
Don’t worry, even if this is your first time setting up an anonymous SMTP relay connector. This guide contains a step-by-step walkthrough using both the Exchange Admin Center (EAC) and Exchange Management Shell (PowerShell). Let’s first explain the what & why of this task.
What is a Dedicated Relay Connector in Exchange Server 2016 & Why Admins Even Set It?
Exchange Server 2016, its predecessor, 2013, and its successor, 2019, all have default receive connectors (usually with a name like “Default Frontend YOURSERVERNAME”).
However, these only allow internal applications to send emails to recipients within your organization (i.e., both sender and receiver share the same domain name or exist within a trusted multidomain forest).
When you try to use these default means to send an email outside to external recipients, you may encounter authentication failure, and the mail won’t leave your server.
That is where a dedicated anonymous SMTP relay connector for Exchange 2016 comes into play. It serves as a controlled gateway to allow specified internal IP addresses to relay email externally. All this without ever needing the traditional username/password authentication.
Please Note: It’s important to distinguish this from other types of client SMTP submissions (often on port 587 using the “Client Frontend YOURSERVERNAME” connector), which are designed for applications and clients that can authenticate.
This guide focuses specifically on the anonymous relay scenario for unauthenticated internal sources. As mentioned earlier, there are two distinct methods to make the connector first is the GUI style EAC.
Method 1: Using the Exchange Admin Center (EAC) to Configure the Relay
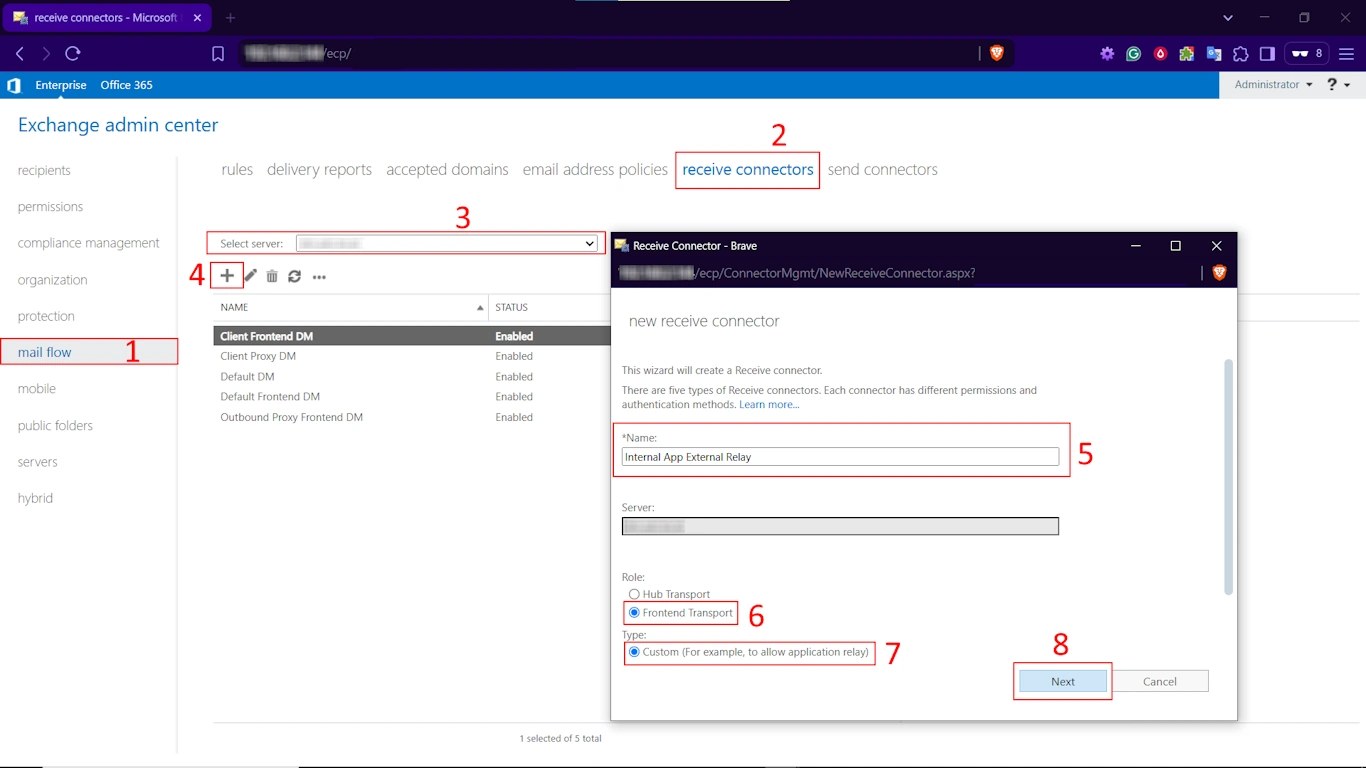
Step 1. Log in to the Exchange Admin Center (IP/ecp).
Step 2. Go to Mail flow > Receive connectors.
Step 3. (Optional) Use the server dropdown, choose the Exchange 2016 server where you want to add the new connector.
Step 4. Press the Plus Icon (+)
- Name: Assign a clear, descriptive name (e.g., “Internal Application Relay”).
- Role: Select Frontend Transport.
- Type: Choose Custom. Click Next.
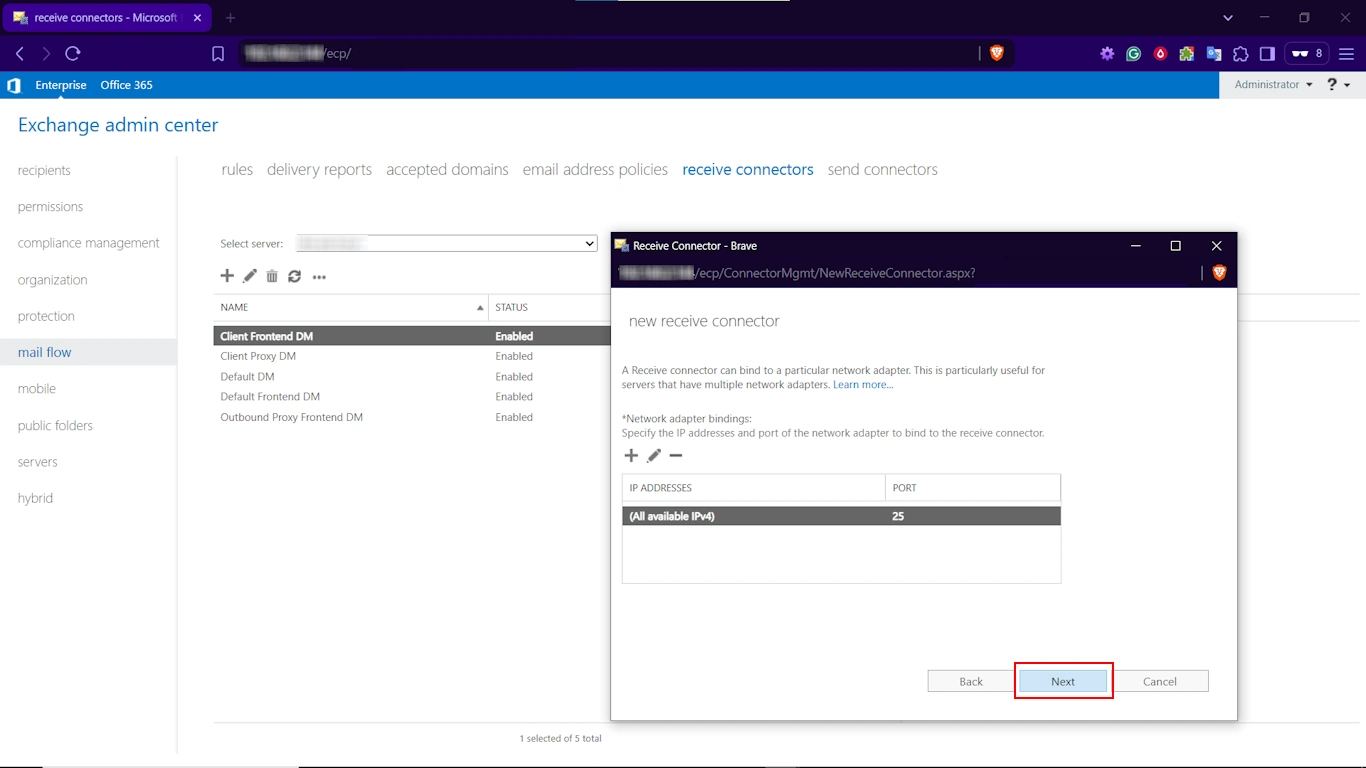
Step 5. Keep the default setting, i.e., All available IPv4, listening on port 25, and click Next.
Step 6. Toggle Remote Network Settings
- Remove the default all-allowing IP range by selecting and hitting the – icon.
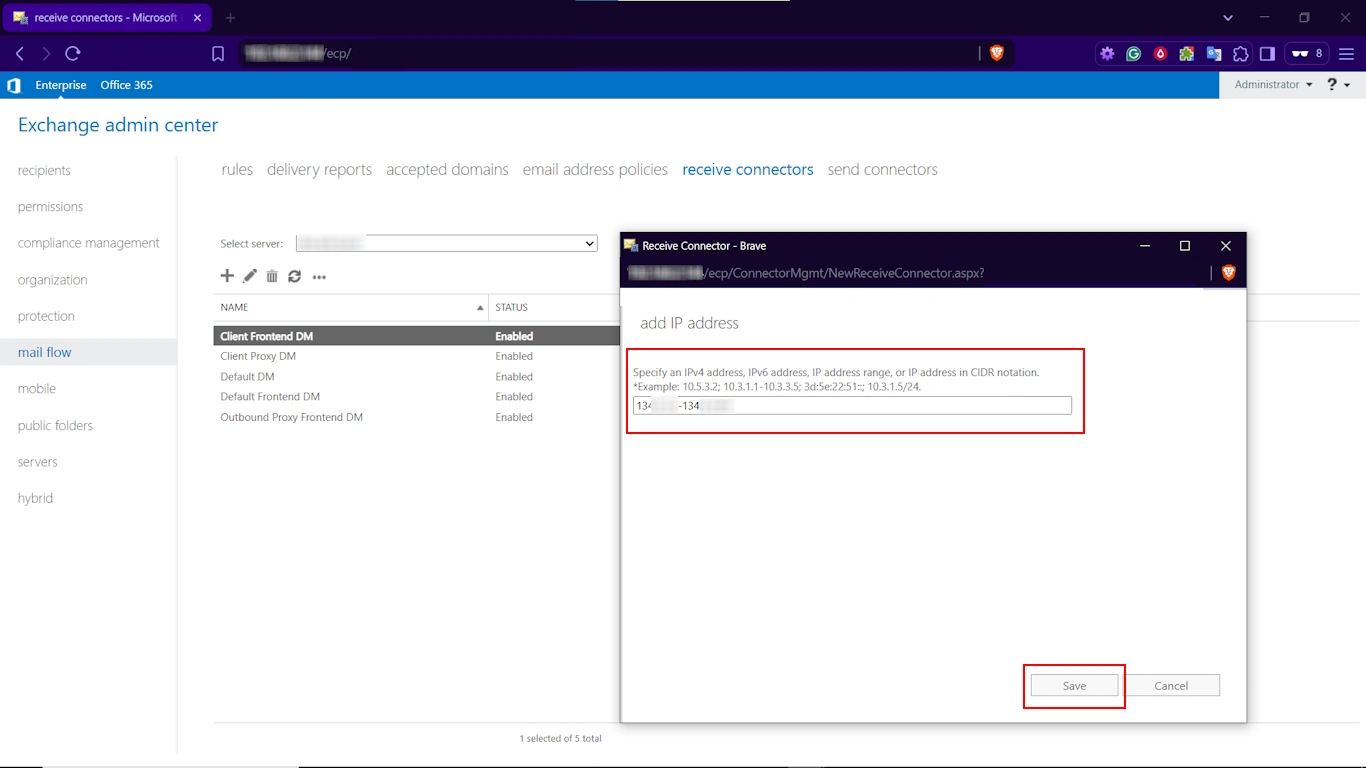
- Then click on the “+” icon. Add the specific IP addresses or IP address ranges of the internal servers, devices, or applications that require relay permissions.
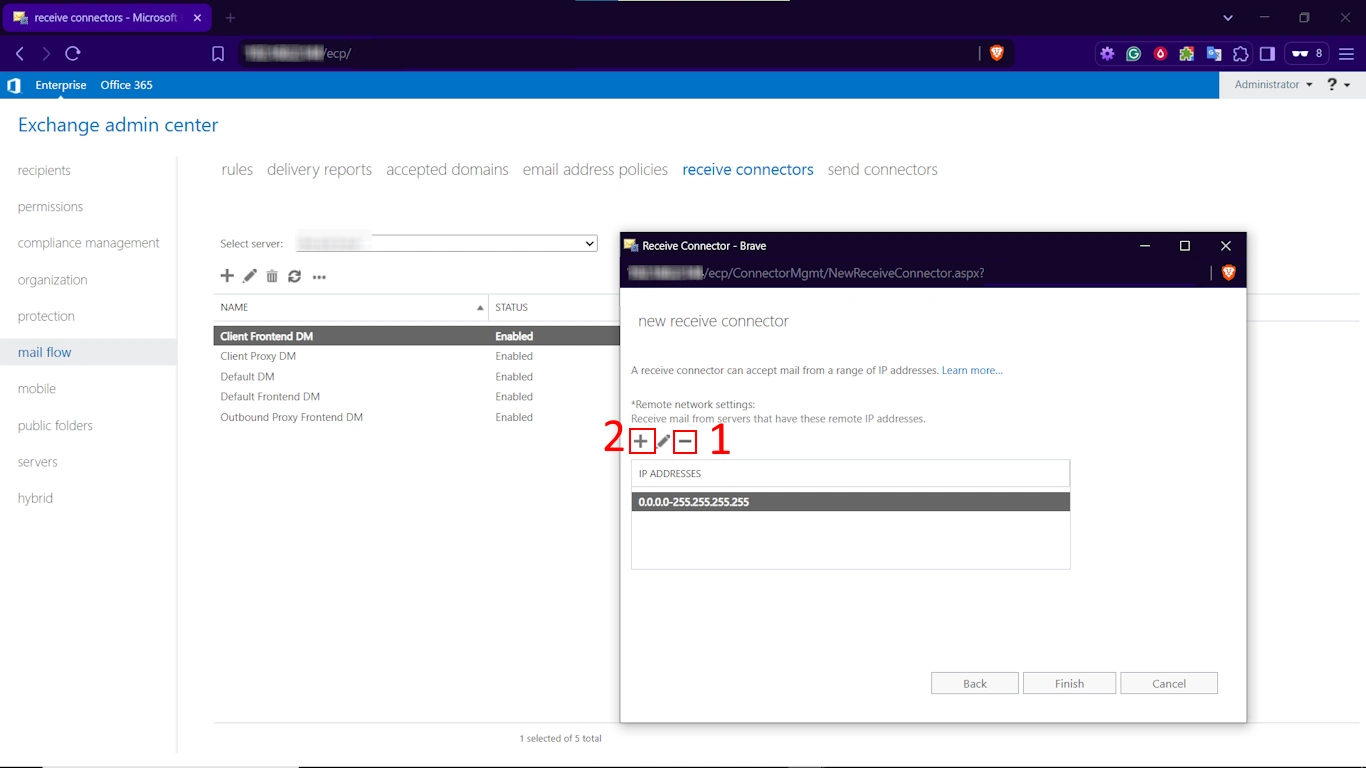
- Note: You must not include your source Exchange Server IP addresses in this list. Press Save.
- Once done, hit Finish.

Secure the EAC-Created Connector
Once you have successfully created a new connector, the EAC takes you back to the list of receive connectors. There, find select and double-click on the one you just created.
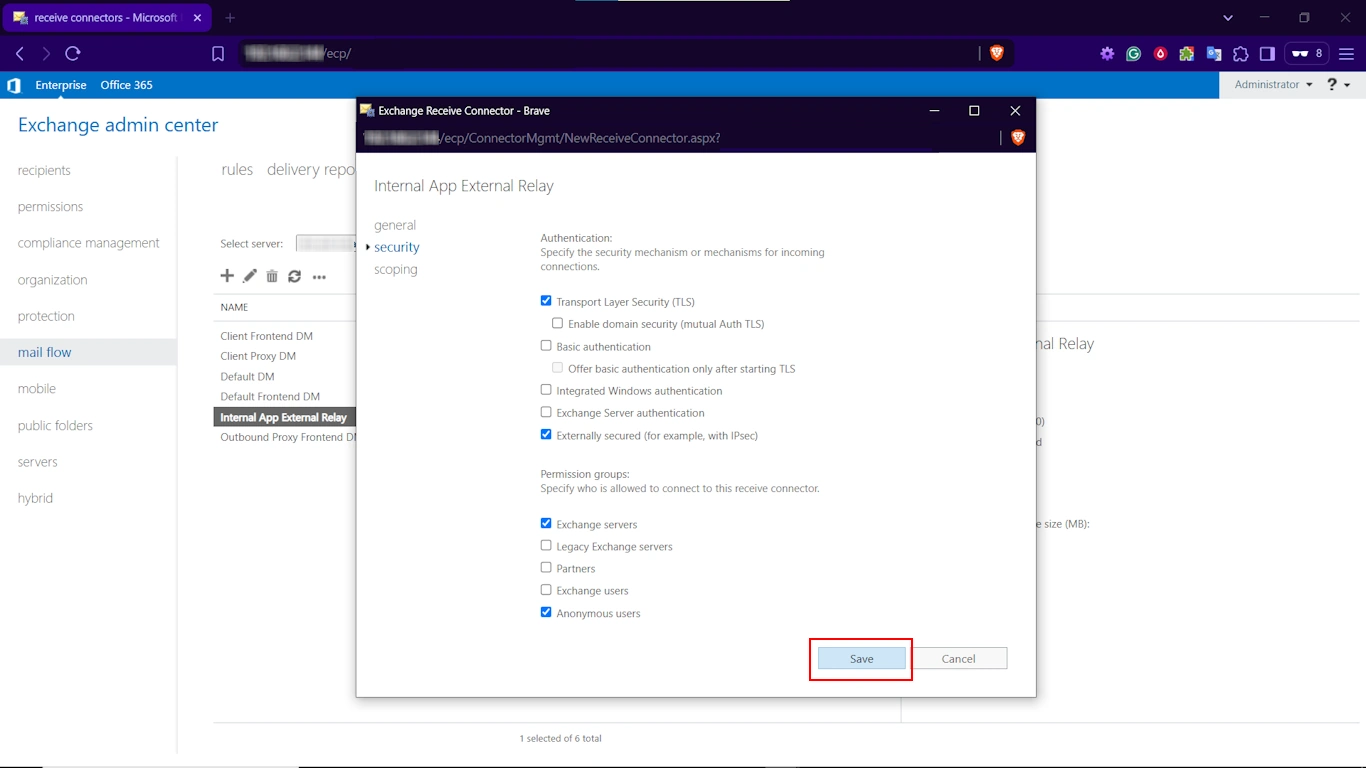
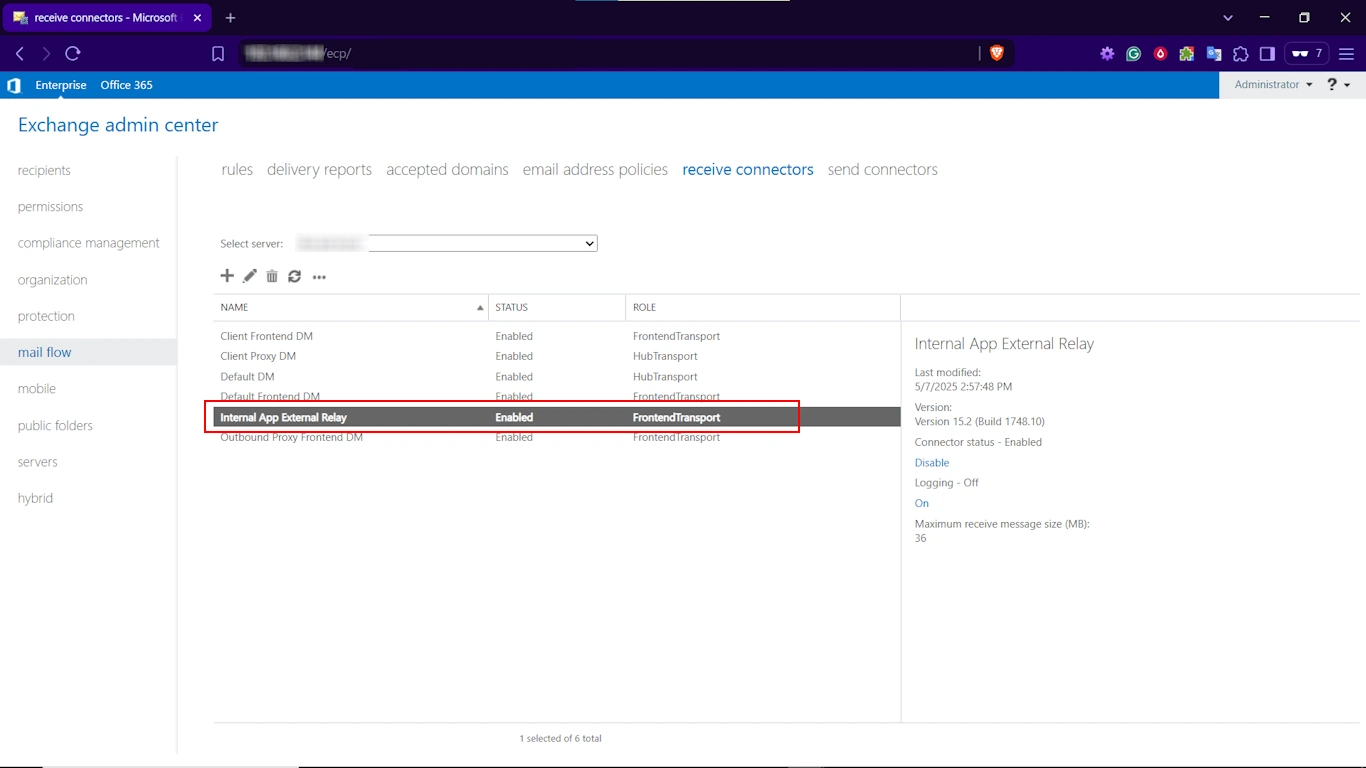 Then, toggle the Security tab and ensure that all the following options are enabled.
- Transport Layer Security” for opportunistic TLS.
- Externally secured (for example, with IPsec) to inform the Exchange Server that the connection is considered secure by other means (for example, by your IP address restrictions).
- Under Permission groups, select “Exchange servers”.
- Finally, press Save.
This completes the EAC-based SMTP relay connection. Next up, we have the script-based method.
Method 2: Using Exchange Management Shell (PowerShell) for Configuration
PowerShell offers an efficient and scriptable method for creating and managing Exchange components, including this type of Exchange 2016 relay.
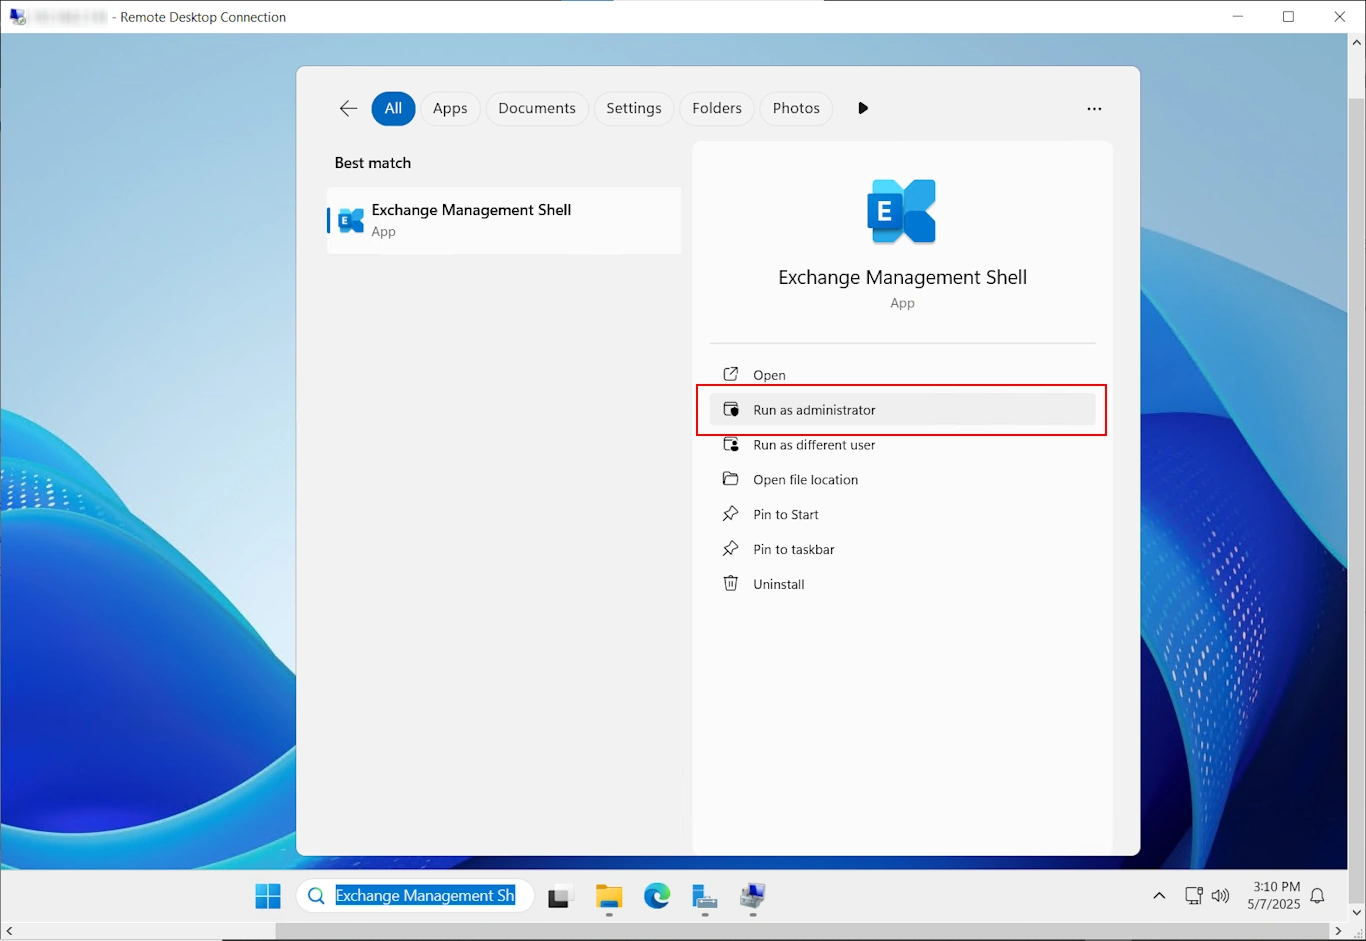
Open Exchange Management Shell as an Administrator.
Create the Receive Connector:
New-ReceiveConnector -Name "InternalApplicationRelayPS" -Server "YOUR_EXCHANGE_SERVER_NAME" -TransportRole FrontendTransport -Custom -Bindings "0.0.0.0:25" -RemoteIPRanges "192.168.1.50", "192.168.1.55-192.168.1.60"
Replace YOUR_EXCHANGE_SERVER_NAME and the example RemoteIPRanges with your specific values. This command initiates the creation of the Exchange Server 2016 relay connector.
Set Security Permissions for Anonymous Relay:
Once the connector is created, configure its permissions to allow anonymous relay from the specified IPs:
Set-ReceiveConnector -Identity "InternalApplicationRelayPS" -PermissionGroups AnonymousUsers
Get-ReceiveConnector -Identity "InternalApplicationRelayPS" | Add-ADPermission -User "NT AUTHORITY\ANONYMOUS LOGON" -ExtendedRights "Ms-Exch-SMTP-Accept-Any-Recipient"
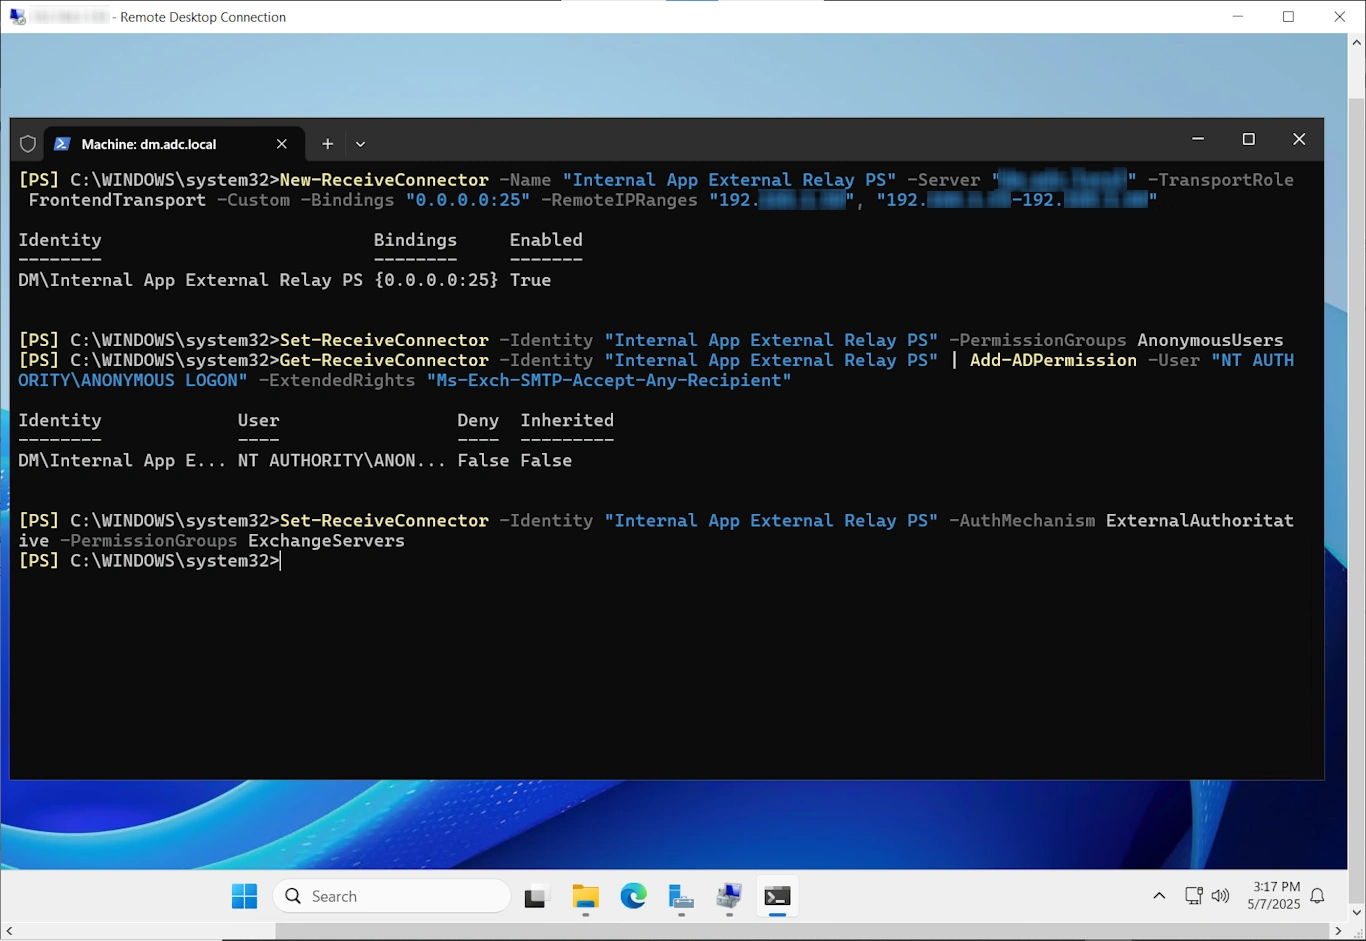
This PowerShell sequence correctly configures the anonymous relay functionality for your Exchange 2016 setup by assigning the appropriate permissions.
Post Creation Step for a Healthy Relay Connector in Exchange 2016: DNS Configuration
Admins must do this to avoid configuring apps with a direct Exchange Server IP Address.
Instead, do this:
- Build a DNS A Record inside your internal DNS (e.g, relay.yourdomain.com)
- Point this A record to the IP address of your Exchange 2016 Server (or the Virtual IP address of your load balancer, if you use load balancers)
- Finally, configure your internal apps and devices to use this FQDN as the SMTP Server. Doing so makes it easy to migrate/change servers in the future, which is bound to happen considering that Exchange Server 2016 and 2019 are in their end-of-support phase.
Strategic Considerations: The Future Beyond Your Exchange 2016 Relay
While configuring this relay in Exchange 2016 addresses current operational needs, it’s also important to consider the lifecycle of Exchange Server 2016. Which is about to expire in October of 2025.
Soon, your organization might need to migrate to a cloud platform like Microsoft 365 from the current premises server.
For that, it is best to rely on the SysTools Exchange to Office 365 Migrator. This tool is purpose-built to manage all on-premise to cloud transitions. Now you know whom to contact when the time comes.