How to Configure Accepted Domain in Exchange 2016?
In this article I am going to discuss about how to configure accepted domain in Exchange 2016. As you already know that once the user installed Exchange Server 2016, they needs to configure accepted domain as it is very important for inbound/ outbound flow of emails. The FQDN (fully qualified domain name) of domain is by default configured as authoritative accepted SMTP domain. Accepted domains set the domain names from where Exchange server can receive mails from and can send emails to. For receiving/ sending emails from different SMTP domains, user must configure this accepted domain in Exchange Server 2016. Whenever the user setups a new Exchange server 2016, they needs to add DNS names in accepted domain. Sometimes these domains are already configured in Accepted Domain that can be only possible, if the user is planning to install new Exchange 2016 in existing Exchange environment. After adding different domains in Exchange, user can view accepted domains in EAC (Exchange Admin Center) and can also use PowerShell command.
There are three types of accepted domains which are Authoritative, Internal Relay and External Relay defined as follows:
Authoritative:
When user will select this option, it’s become very important that user must add the recipient to exchange before sending a mail through the service.
If it is listed for recipient in exchange server then emails only will delivered to recipient. It is a domain that only hosts recipients.
Internal Relay:
When user select this option, the exchange server of any organization will host some mailboxes and the remaining mailboxes hosted from somewhere else.
External Relay:
In this, exchange server of organization receive emails from non authoritative domain and uses send connector to forward them to authoritative mail server.
How to Configure Accepted Domain in Exchange 2016
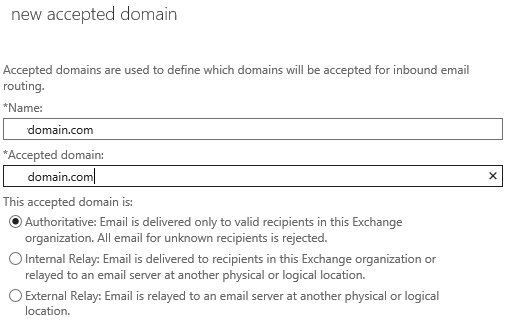
User must log on to Exchange Admin Center to configure accepted domain in Exchange 2016. After logging into EAC select Mail Flow option present in left pane and then click on the Accepted Domains to view existing accepted domains. 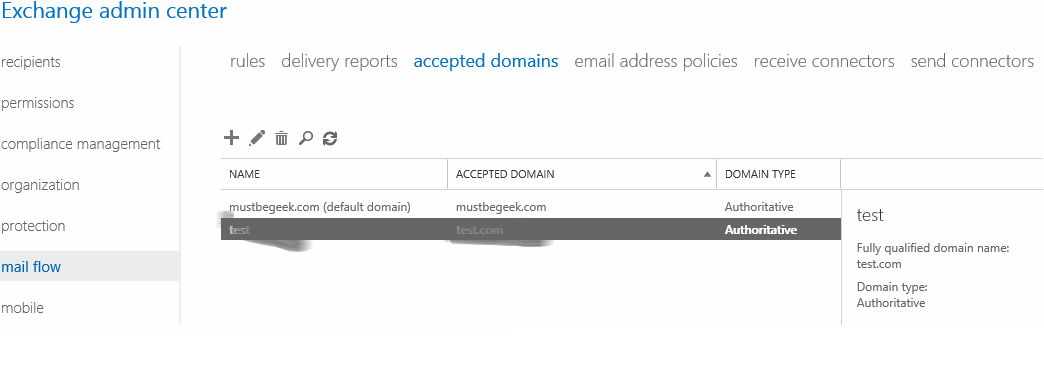 User needs to click on “+” icon to add a new accepted domain in Exchange server, system will display the below window to perform this task. Here user can enter name for the accepted domain.
User can also use Exchange PowerShell command to create and view accepted domains, by using New-AcceptedDomain cmdlet they can create an accepted domain in the organization.
New-AcceptedDomain -DomainName zomaro.com -DomainType Authoritative -Name zomaro
In order to get the summery information of all accepted domains, user can run Get-AcceptedDomain command to view the details.
User can follow the following syntax to run this command:
Get-AcceptedDomain | Format-List
Get-AcceptedDomain | Format-List
with above given methods, one can add SMTP namespace and DNS to accepted domain and also facilitates the different ways to checkout the domain name present in accepted domain.
That’s all the required things and steps to configure accepted domain in Exchange 2016.
Conclusion:
In any Exchange organization to setup the inbound and outbound message flow, one needs to add domain names in accepted domain by which user can receive emails from that specified domains and also can send emails to them. There exists very easy above mentioned methods to configure accepted domain in Exchange 2016 that user can use to perform this task.
Tej Pratap Shukla
about.me/tejpratap