Create a Shared Calendar in Exchange Server 2010
The blog illustrates about how to create a shared calendar in Exchange Server 2010. First of all, one will have to create a new public folder for creation of Shared Calendar. Therefore, first we will discuss measures to create public folder and then will learn how to create shared calendars.
Creating a Public Folder
There exists two approaches for creating a new Public Folder and those are mentioned below:
Approach 1: Using Exchange Management Console
- Open the machine in which Exchange Server 2010 is present and launch Exchange Management Console application.
- Click on + button of Microsoft Exchange On-Premises >> Organization Configuration for expanding them and then select Mailbox option
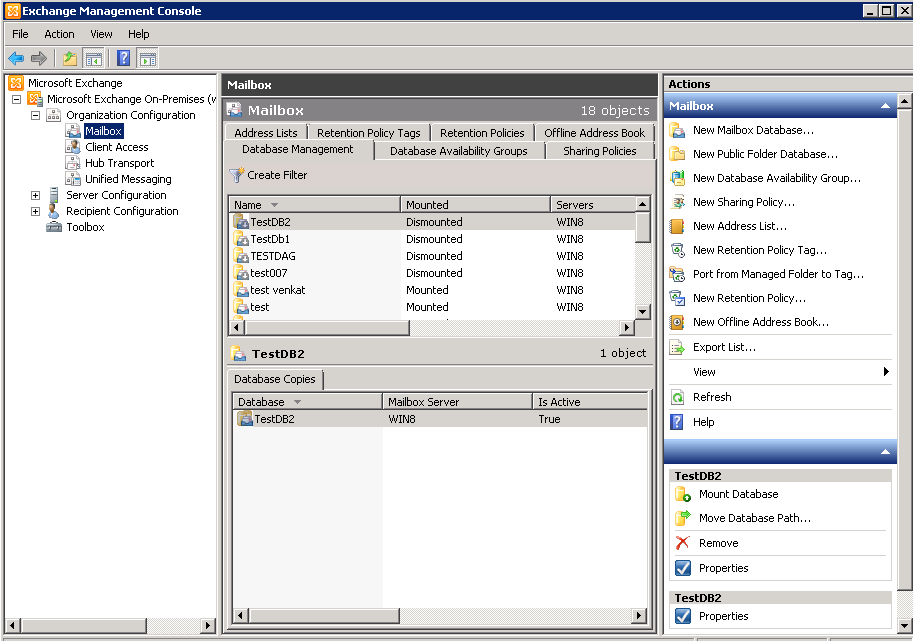
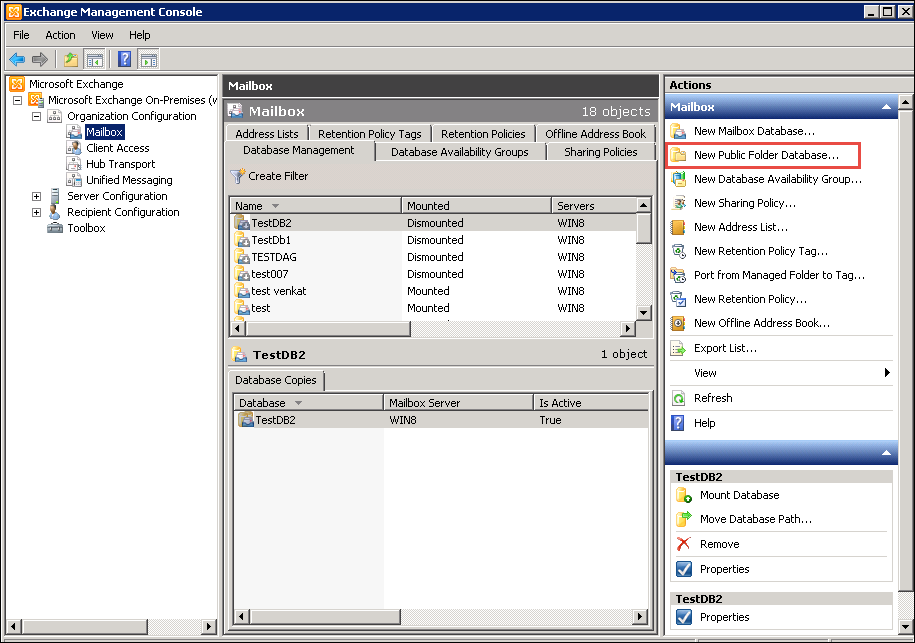
- From right-hand side of the window, click on New Public Folder Database option
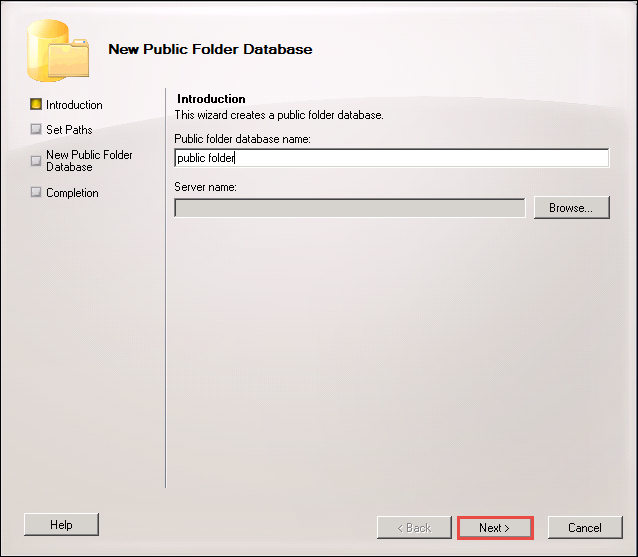
- Now a New Public Folder Database window will appear in which first mention the name of Public folder database name and then click on Browse button for associating the database with Exchange server
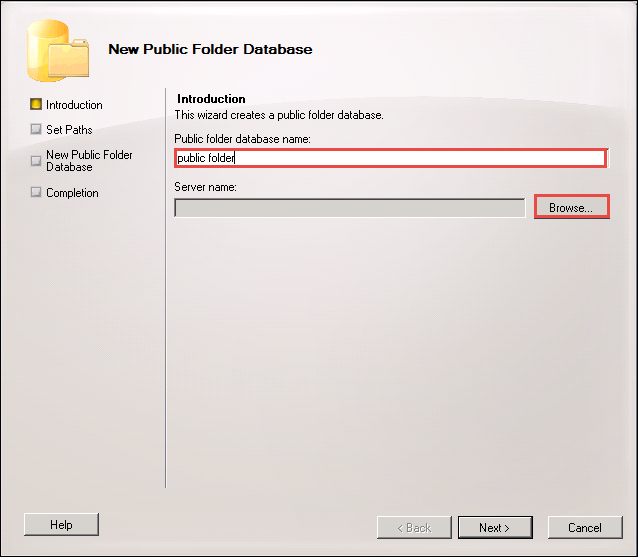
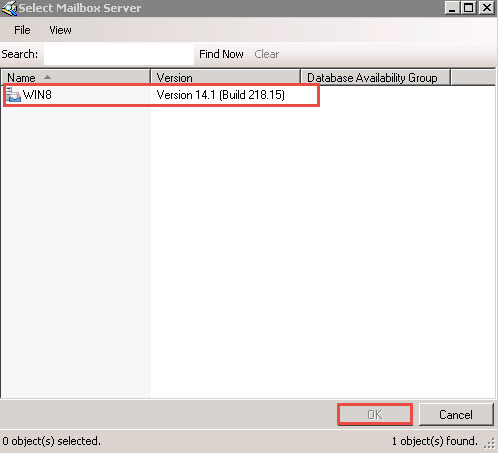
- After clicking on Browse button, a Select Mailbox Server window will appear in front of you. From this window, select the Exchange Server that you want to use and then click OK button for returning back to previous window
- Click on Next button from New Public Folder Database window to continue
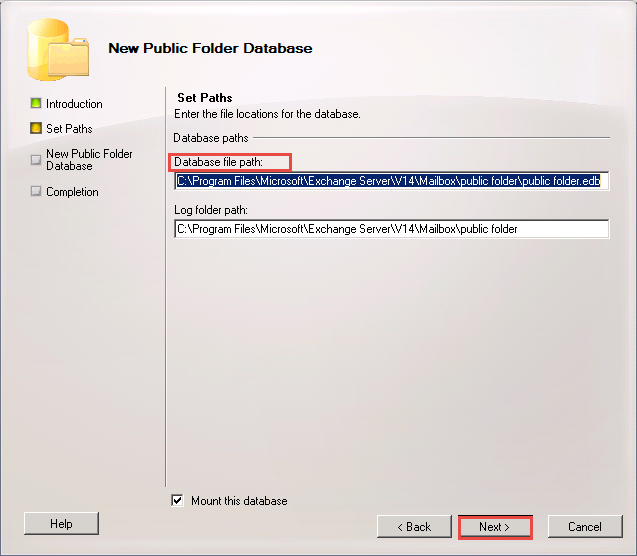
- Define the destination path of Public Folder database (in .edb file extension) by mentioning the location in Database file path field and also define the location where log files will be stored. Examine that Mount this database check-box is checked and then click on Next button.
- At the end, click on New >> Finish button that will finally create a public folder in Exchange 2010.
From left hand side of the Exchange Management Console window, you can examine the newly created Public Folder by expanding Organization Configuration >> Mailbox options.
Approach 2: Using Exchange Management Shell
To create a new folder with the help of management shell, execute the below-mentioned command within the shell:

Create a Shared Calendar in Exchange Server 2010
- Launch MS Outlook on your machine.
- From bottom of the window, click on … (triple dot) icon for opening the menu.
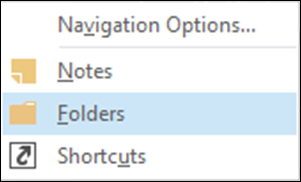
- Click on Folders options from the menu appearing in front of you.
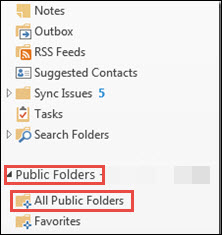
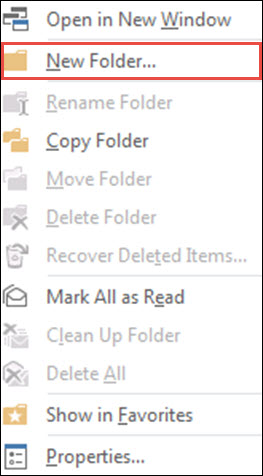
- Here you will see the newly created Public Folder. From the menu of Public folder, Right-click on All Public Folders and then select New Folder
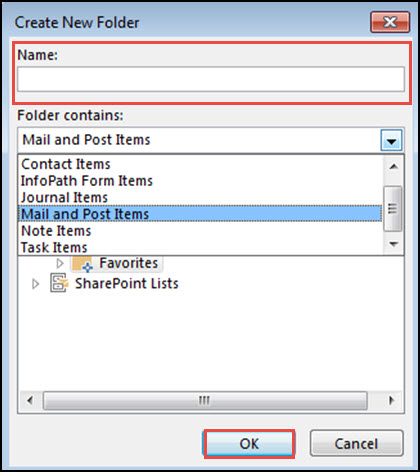
- Now Create New Folder window will appear. In this windows, mention the name of the output folder, and from Folder contains field, search for & click on Calendar Items. After successfully finishing up with all the steps, click on OK button.
- Now you have created a shared calendar. Moreover, you can make Shared Calendar in exchange server 2010 available in Calendar tab of Outlook via step 7.
- Expand the Public Folder and search for your created shared calendar. Right-click on that calendar and select Add to Favorites options.
- To check the shared calendar in Outlook calendar, expand the Other Calendar options and there you will find your shared calendar.
Conclusion
In this article we have discussed about how to Create a Shared Calendar in Exchange Server 2010 show the shared calendar in calendar tab.
By just creating a Public Folder in Exchange Server, one can easily create a calendar that is to be shared among users. This content will completely guide with the measures for creating the calendars in an easy way.