Top 2 Ways to Perform Cross Forest Mailbox Exchange Migration
A Process by which users move their mailboxes from one Active directory to the other one. As various condition occurs when a user needs to upgrade the Exchange Version from older to Newest version but getting problem while following the process of cross-forest migration. Since Various Exchange Server Version such as 2013(widely used by people), 2010, 2007 and Old 2003 Version used all over the world Exchange Administrator.
Table of Contents
Since most, users are finding methods for Exchange 2010 to Exchange 2016 migration. So, after considering it, in this article, we will describe an efficient method of Exchange 2010 to Exchange 2016 Cross Forest migration. Now, let us discuss the technique for migration in detail.
Steps to Move From Exchange 2010 to Exchange 2016
This manual procedure is helpful for small organizations to update their Server from Exchange 2010 to Exchange 2016 Version without any inconvenience. Before moving to Exchange 2016, users must fulfill the prerequisites related to hardware, software, and email clients. After that, perform the following steps to move mailboxes from Exchange 2010 to Exchange 2016 Server:
- Migration of system mailboxes from Exchange 2010 to Exchange 2016
- Configuration of SCP and DNS to Exchange 2016 Server.
- Move Mailboxes from Exchange 2010 to Exchange 2016.
Step #1: Migration of System or Arbitration Mailboxes from Exchange 2010 to Exchange 2016
Arbitration mailboxes used to store data such as administrator audit logs, data for eDiscovery searches, and Unified Messaging data. Normally, Microsoft Exchange system mailboxes entitled as SystemMailbox(e0dcac29-89c3-4034-b678-e678-e6c29d823ed9).As a part of Exchange 2016 services configuration, users can first move arbitration mailboxes from Exchange 2010 to Exchange 2016. To do this, users need to follow instructions carefully:
- Transfer Migration mailboxes via. Exchange Management Shell
- Transfer system mailboxes using EAC
Method #1: Transfer Migration Mailboxes Via. Exchange Management Shell (EMS)
Migration mailbox is the primary system mailbox that is transferred to Exchange 2016. This can be easily done with Exchange Management Shell. For this, users need to follow the instructions that are mentioned below:
- Initially, open the Exchange Management Shell in mailbox server. Afterward, to open the record of Exchange mailbox database, run the following cmdlet command:
“Get-MailboxDatabase | Where {$_.AdminDisplayVersion -Like “*15.1*”} |Format-Table Name, ServerName”
- Select the name of desired mailbox database where the migration mailbox is to be exported.
- Now, execute the below mentioned cmdlets:
New-MoveRequest “Migration.8f3e7716-2011-43e4-96b1-aba62d229136”-TargetDatabase “”
After that, verify the migration process with the help of Windows PowerShell cmdlets:
“Get-Mailbox “Migration.8f3e7716-2011-43e4-96b1-aba62d229136”-Arbitration | Format-ListName, Database, ServerName, AdminDisplayVersion”
At last, verify the value of AdminDisplayVersion property. If the value is version 15.1, then it shows the migration process is successfully executed.
Method #2: Transfer System Mailboxes Using Exchange Admin Control (EAC)
Once the Migration of Mailboxes done by Windows PowerShell cmdlet. Then, rest of the mailboxes can be moved into Exchange 2016 with the help of Exchange admin center (or EAC). To do this, follow the below instructions:
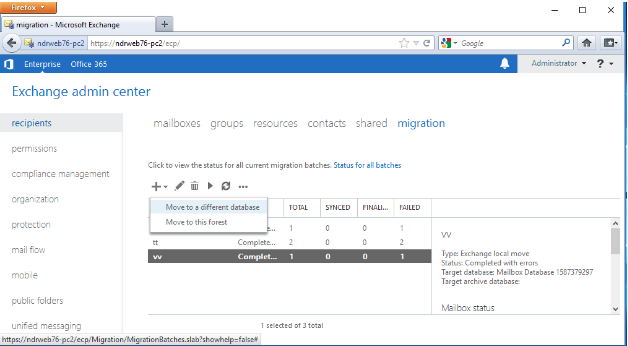
- Open Exchange admin center or EAC.
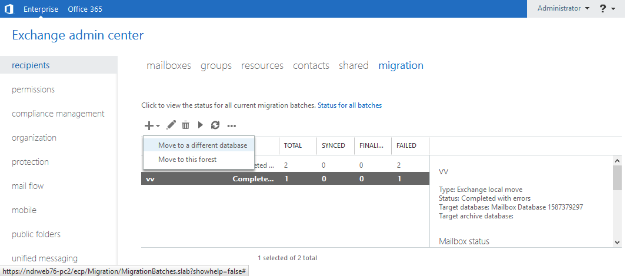
- Click on Recipents>> Migration. Afterward, click on (+) and select “Move to a different database” from the resulted menu.
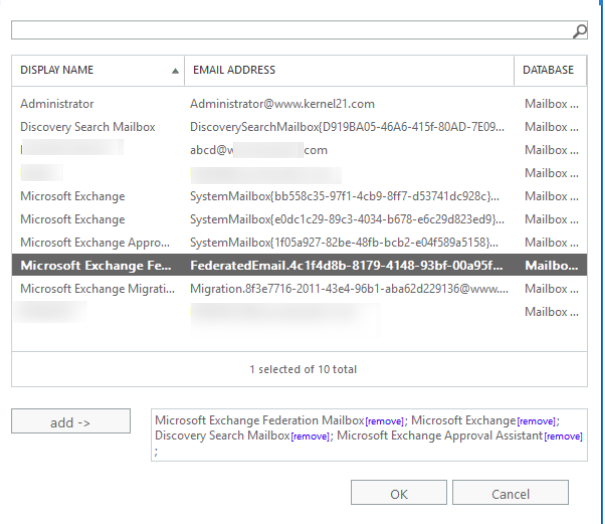
- After that, select the desired users you want to export and click on (+).
- Once you select the users then, add the following system mailboxes sequentially and click on Add.

Once all the mailboxes are selected, click on Ok button.
-
- After that, click on Next.
-
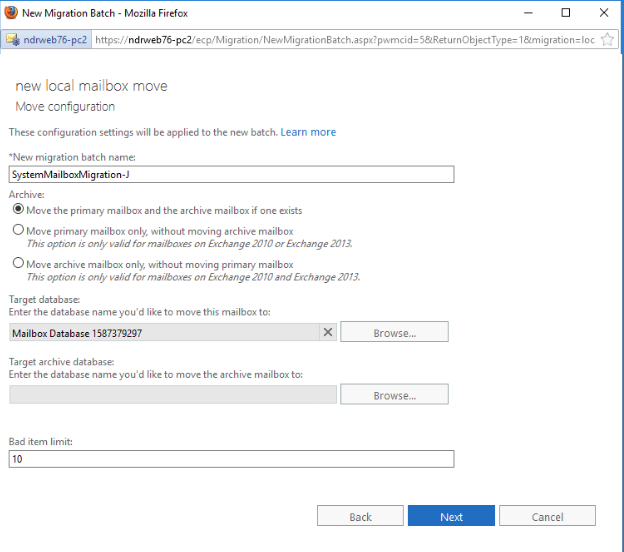
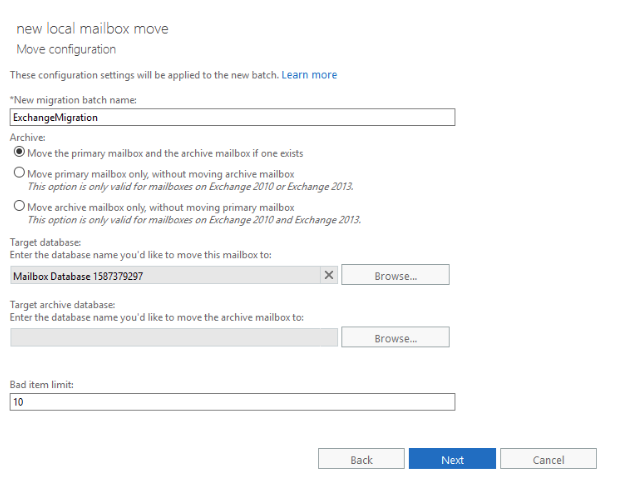
- Provide a name for the migration batch and also give a name to the database under the Target database and click Next.
-
- Now, pick the required option for the notification settings and click on New button.

-
- Once the above step is successfully executed, run the cmdlets command and verify the migration.
Get-Mailbox-Arbitration| FL Name, Database, ServerName, AdminDisplayVersion
-
- Again check the value of AdminDisplayVersion property. If it is equal to Version 15.1 (Build xxx.xx), then migration is successfully done.
Step #2: Configuration of SCP and DNS to Exchange 2016 Server
To configure internal and external URLs and system mailboxes too, users must require to first configure Service Connection Point (or SCP) and modify Domain Name System ( DNS) record. For this, users need to follow the below given steps:
-
-
- Configure Service Connection Point in Exchange Server
- Configure DNS Exchange Record
-
Method 1: Configure the Service Connection Point in the Exchange Server
In this section, we will describe how to establish SCP in Exchange 2010 and 2016 efficiently. Let’s discuss each step in detail:
In Exchange 2010
1. Open the Exchange Management Shell in the Client Access Server (CAS) that is present in the Exchange 2010 mailbox server. After that, run the following command:
$AutodiscoverHostName = “<Autodiscover host name of your Internet-facing Exchange 2016 Mailbox server>”
2. Now, run the following command:
“Get-ExchangeServer|Where{($_.AdminDisplayVersion-Like“Version14*”)-And ($_.ServerRoleLike“*ClientAccess*”)}|Set-ClientAccessServer-AutoDiscoverServiceInternalUri https://$AutodiscoverHostName/ Autodiscover/ Autodiscover.xml”
3. Run the following cmdlets command to verify the SCP in the Exchange 2010 Server:
Get-ExchangeServer | Where {($_.AdminDisplayVersion -Like “Version14*”) -And ($_.ServerRole -Like“*ClientAccess*”)} | Get-ClientAccessServer | Format-Table Name, AutoDiscoverServiceInternalUri -AutoIn Exchange Server 2016
For Exchange 2016 Server
-
- Open the Exchange Management Shell in the Exchange Server 2016 mailbox server. After that, execute the following command:
$AutodiscoverHostName= “<Autodiscover host name of your Exchange 2016 Mailbox Server>”
-
- Once the above command is executed, run the below-mentioned command:
Get-ExchangeServer | Where {( $_.AdminDisplayVersion -Like”Version 15.1*”) -And ($_.ServerRole -Like “*Mailbox*”)} | Set- ClientAccesservice -AutoDiscoverServiceInternalUri https:// $ AutodiscoverHostName /Autodiscover /Autodiscover.xml
- To cross-check the settings, run the below display command:
- Once the above command is executed, run the below-mentioned command:
Get-ExchangeServer | Where {($_.AdminDisplayVersion -Like”Version 15.1*”) -And ($_.ServerRole -Like “*Mailbox*”)} | Get- ClientAccessService | Format-Table Name, AutoDiscoverServiceInternalUri -Auto
Method 2: Configure DNS Exchange Record
At last, users need to change the Domain Name System records. To do this, as per the requirement, users can update Public and Internal DNS Records. By doing this, Exchange 2016 services gets configured completely. Now, users can freely move public folders from Exchange 2010 to Exchange 2016 Server.
Step #3: Move Mailboxes to Exchange 2016 From Exchange 2010 Mailbox
Once configuring the Exchange 2016 services, now user can move mailboxes from Exchange 2010 to Exchange 2016 with the help of the Exchange admin center or EAC.
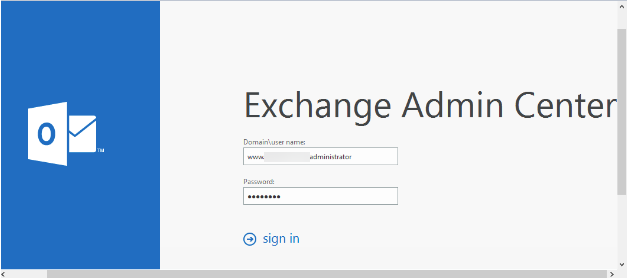
- Open EAC by providing the authentic credentials.
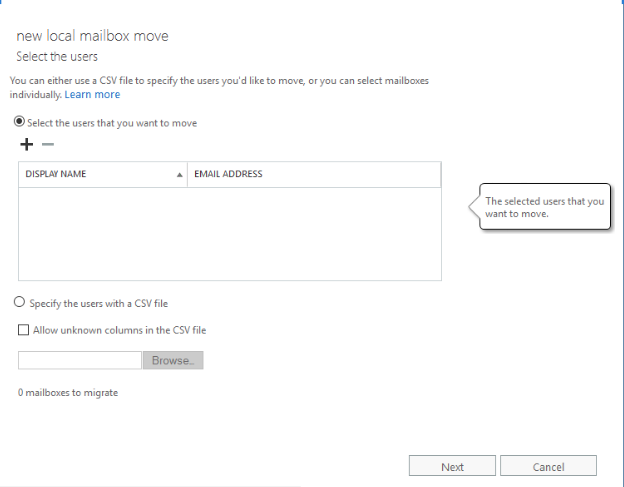
- In the EAC, click on recipients > >migration. After that, click (+), and select “Move to a different database” from the resulted menu list.
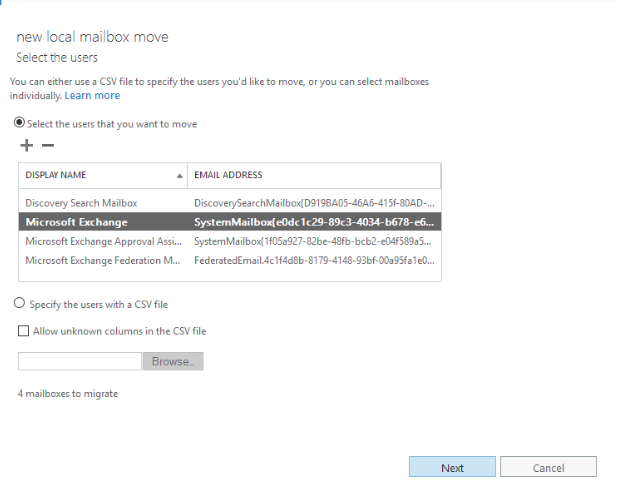
- In the “new local mailbox move” page, click on (+). Then, choose the users that you want to transfer.
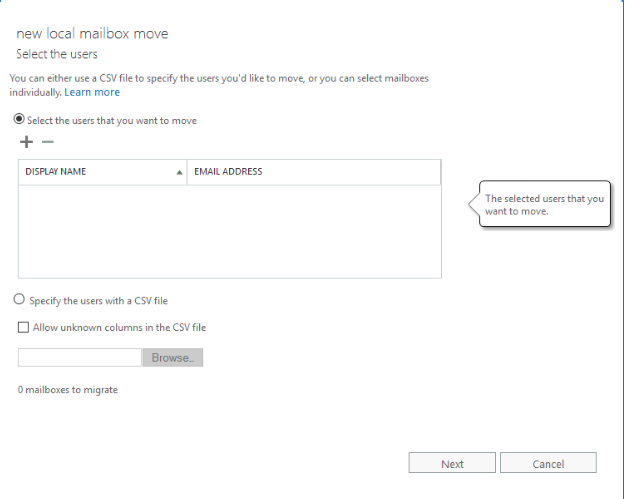
- Now, from the new window, select Mailbox. Afterward, select and add the mailboxes for migration and click add>>Ok.
- From the new local mailbox move page, the mailboxes get listed under Select the users that you want to move section. Then, click on Next. Now, provide a name under the Target database where you want to migrate mailboxes and click on Next.
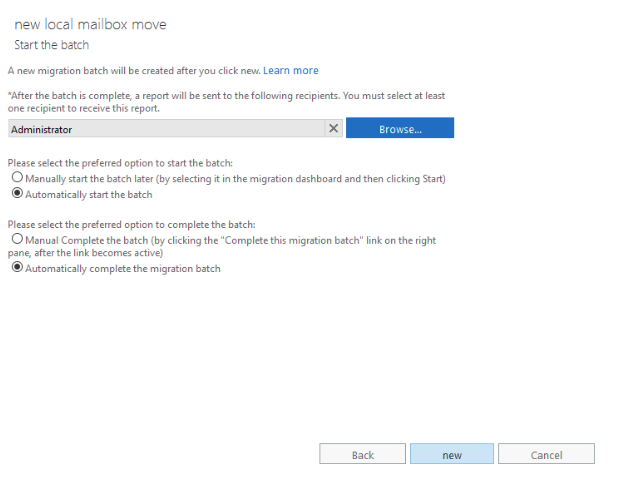
- Choose a user who is to receive notifications; by default, it is an Administrator. Select the “Automatically start the batch” and “Automatically complete the migration batch”. At last, click on New.
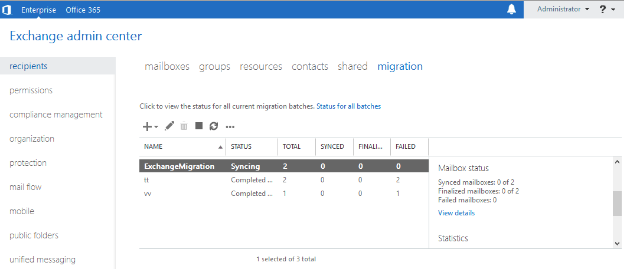
- To verify the migration, go to recipients > >migration. Select the migration batch, and click View details.
Professional Technique For Exchange Migration
It is clear from the above that manual procedure is too long and time-consuming. Also, users must comfortable working with Windows PowerShell cmdlets commands. Hence, the best Exchange to Exchange Migration Tool is recommended for the Cross Forest Exchange migration. This tool is basically designed to move mailboxes from Live Exchange Server to Target Exchange Server such as Exchange 2010 to 2016 migration.
Moreover, it provides a Pre-migration data analysis report while moving from older Exchange database to a newer one. It always keeps the folder structure intact after the conversion of previous Exchange data to a new Exchange server. Also, it has a self-introductory interface that makes the whole process easy and smooth.
Note: IF you don’t want to go for Cross-Forest Migration and want to only export Exchange Mailbox to PST to open in Outlook format, you can also try SysTools Exchange Export Utility.
The Observational Verdict
Performing a Cross-Forest Mailbox Migration In Exchange 2016/13/10 with the help of manual procedure can be a lengthy, confusing process as well as a Time-Consuming process. Since it includes complicated PowerShell commands that can become a problem for a naive Exchange Administrator. So to make cross-forest migration easy and Time-Saving without Power-shell commands, it is highly recommended to opt the Exchange to Exchange Migration software for the safe and secure migration between the two different Active Directory Forest.